This oven baked 4-ingredients crispy chicken livers recipe is one of those old-fashioned, no-fuss dishes that feels like it came straight out of a Sunday supper at Grandma and Grandpa’s house. My grandfather actually requested this classic for Sunday dinner, and he couldn’t believe it only took four simple ingredients and the oven to get that dark, crunchy, seasoned coating he remembered from his childhood. Everything happens on a foil-lined baking sheet, so cleanup is easy, and the result is cozy, budget-friendly comfort food that still feels special enough for family gatherings.
These crispy chicken livers are wonderful piled onto a warm platter with a sprinkle of extra salt right out of the oven. I like to serve them alongside mashed potatoes or buttered egg noodles, with a simple green vegetable like steamed green beans or a tossed salad to balance the richness. A little dish of ketchup, barbecue sauce, or honey mustard on the side keeps the kids happy, while adults might enjoy them with a squeeze of lemon and a slice of crusty bread to soak up any juices. They’re best eaten hot and fresh from the pan while that coating is still truly crisp.
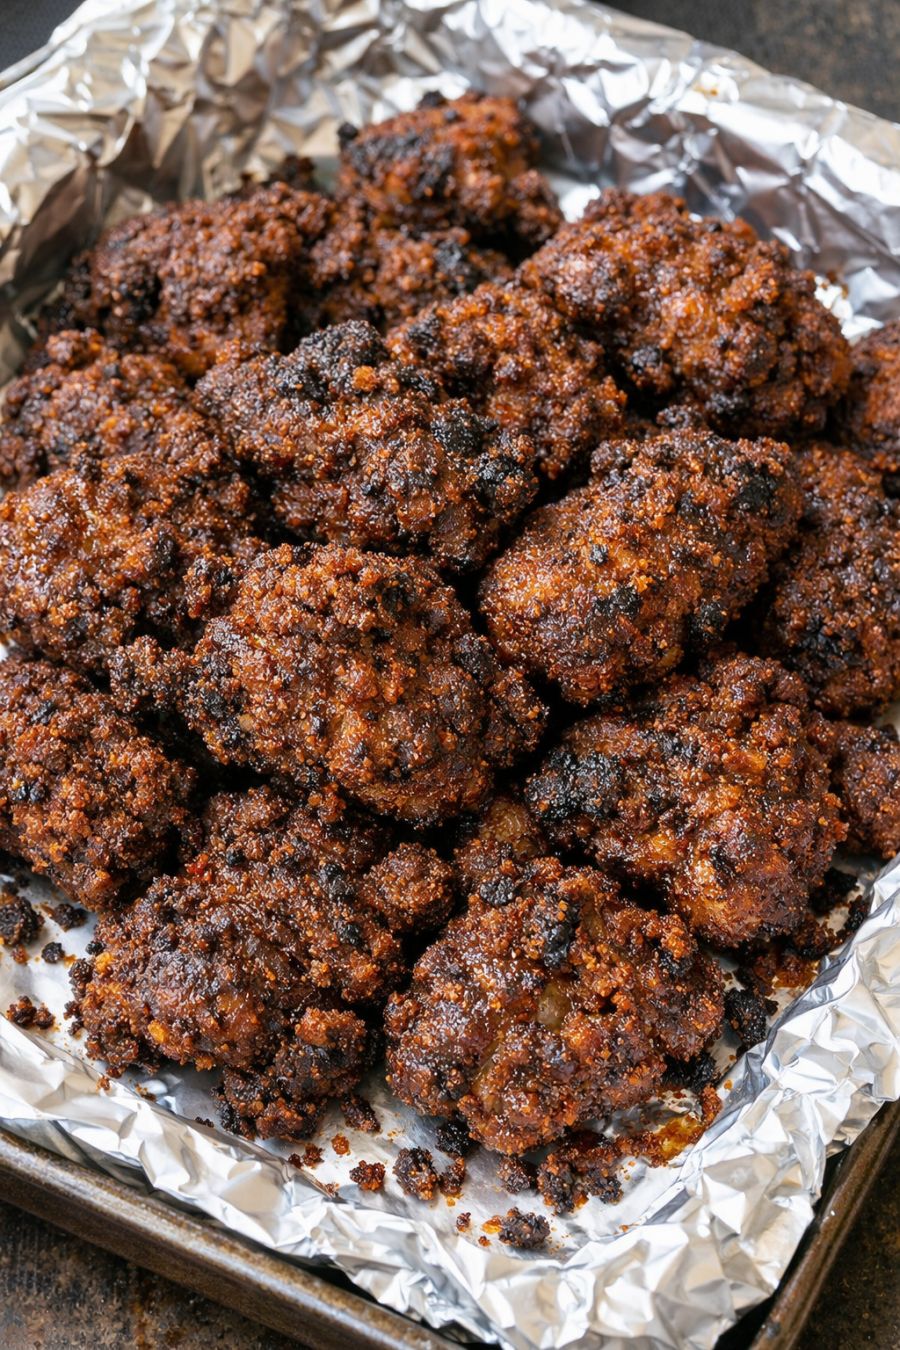
Oven Baked 4-Ingredients Crispy Chicken Livers
Servings: 4
Ingredients
1 1/2 pounds chicken livers, trimmed and patted very dry
1/3 cup vegetable oil (or other neutral oil with a high smoke point)
1 1/2 cups seasoned dry bread crumbs
1 teaspoon kosher salt (plus more to taste after baking)
Directions
Preheat your oven to 425°F (220°C). Line a large rimmed baking sheet completely with aluminum foil for easy cleanup, then lightly grease the foil with a little of the vegetable oil or nonstick spray.
Prepare the chicken livers by trimming away any visible fat or connective tissue. Gently separate any that are stuck together so they cook evenly. Rinse quickly under cool water if needed, then lay them out on paper towels and pat them very dry. This helps the coating stick and encourages a crispy, dark crust instead of steaming.
In a shallow bowl or pie plate, stir together the seasoned dry bread crumbs and kosher salt until well mixed. Taste a pinch of the dry mixture and adjust the salt if needed, remembering you can sprinkle on a little more right after baking.
In a separate medium bowl, toss the dried chicken livers with the vegetable oil until each piece is lightly coated and glossy. The oil takes the place of eggs or milk here and helps the crumbs cling while also crisping in the oven.
Working a few pieces at a time, roll the oiled chicken livers in the seasoned bread crumbs, pressing gently so the crumbs stick and form a good, even coating. Shake off any loose crumbs and place each liver in a single layer on the prepared foil-lined baking sheet. Leave a little space between pieces so the hot air can circulate and crisp them up.
Once all the livers are coated and arranged on the pan, lightly sprinkle any remaining seasoned crumbs over the tops, pressing gently where needed to fill in thin spots. This creates that dark, crunchy seasoned coating you’re looking for in the finished dish.
Bake the chicken livers on the middle rack for 15 minutes, then carefully flip each piece with tongs or a spatula. Return the pan to the oven and bake for another 8–12 minutes, or until the coating is deep golden-brown and crisp and the livers are cooked through but still tender inside. Total time will be about 23–27 minutes depending on the size of the pieces.
To check doneness safely, cut into the thickest liver: the center should be no longer raw or bloody and should be just barely pink to tan, or use an instant-read thermometer and look for an internal temperature of at least 165°F (74°C). Do not overbake too far past this or the livers can turn dry and chalky.
As soon as the livers come out of the oven, sprinkle lightly with a bit more kosher salt if you like. Let them rest on the pan for 3–5 minutes to set the crust, then transfer to a serving platter and enjoy while hot and crispy.
Variations & Tips
For picky eaters, you can cut the chicken livers into smaller bite-size pieces before coating so they feel more like nuggets; just reduce the baking time slightly and watch carefully so they don’t overcook. If your family prefers a milder flavor, look for very fresh livers and soak them in cold water for 15–20 minutes before drying and coating to soften the taste (this doesn’t count as an extra ingredient, just a rinse). You can also use extra-crispy or panko-style seasoned bread crumbs for an even crunchier coating, or choose Italian-style seasoned crumbs if you like more herbs. If sodium is a concern, use low-sodium seasoned bread crumbs and reduce the added salt, then let everyone salt their own at the table. For a little extra richness, drizzle the coated livers very lightly with a bit more oil before baking, but don’t add butter or cheese if you want to keep the recipe strictly 4-ingredient. Food safety tips: Always keep raw chicken livers refrigerated until you’re ready to cook and handle them with clean hands and utensils. Use separate cutting boards for raw meat and vegetables, and wash all surfaces, knives, and your hands with hot, soapy water after handling. Make sure the livers reach at least 165°F (74°C) in the thickest part; undercooked chicken livers can carry harmful bacteria. Don’t leave the cooked livers out at room temperature for more than 2 hours—refrigerate leftovers promptly in a shallow container and reheat in a hot oven to re-crisp the coating before serving again.
