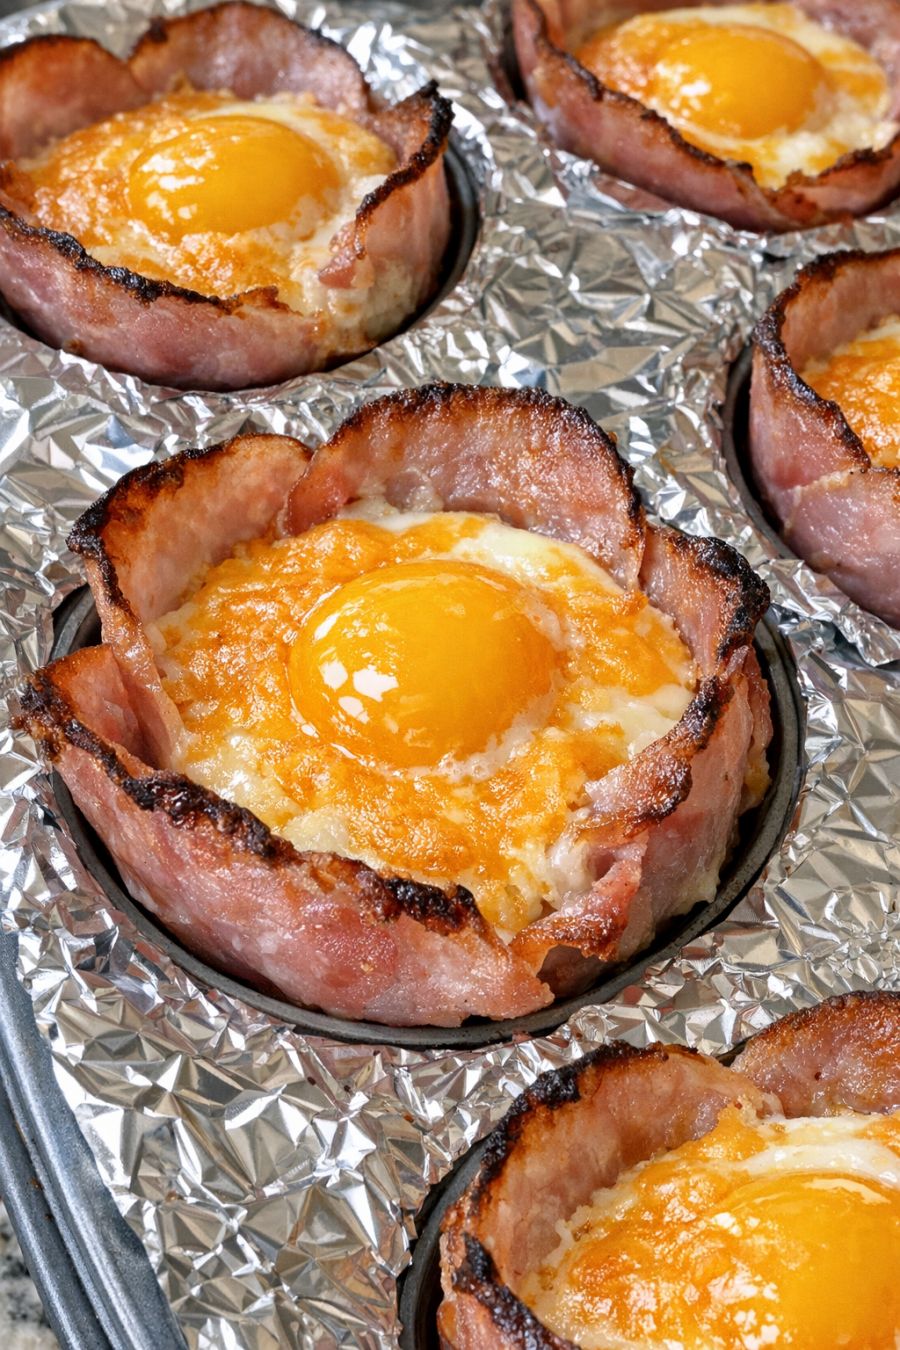
This low carb 3-ingredient Amish baked ham and eggs recipe is my spin on the kind of hearty, protein-packed breakfast my Uncle John swears by before heading out to work in the fields. It’s the kind of simple, no-fuss farmhouse food that keeps you full for hours: salty ham, rich baked eggs, and a blanket of melted cheddar, all crisped up together in the oven. Everything bakes in a foil-lined muffin tin, so cleanup is easy and you can prep a whole week of grab-and-go breakfasts in one shot.
These baked ham and egg cups are filling on their own, but I like to round out the plate with a few simple sides: sliced fresh tomatoes or cucumber, a handful of berries, or a small green salad if you’re keeping things low carb. If you’re feeding kids or folks who want more carbs, add a slice of toast, an English muffin, or some breakfast potatoes on the side. They’re also great tucked into a low-carb tortilla for a quick breakfast wrap, or packed in a container with some avocado slices for an easy desk breakfast.
Low Carb Amish Baked Ham and Eggs
Servings: 6 (12 ham and egg cups, 2 per person)
Ingredients
12 thin slices deli ham (about 8–10 oz total, preferably smoked or country-style)
12 large eggs
1 cup shredded sharp cheddar cheese
Directions
Preheat your oven to 375°F (190°C). Line a standard 12-cup muffin tin completely with a single layer of aluminum foil, pressing it down into each well so it fits snugly, then lightly grease the foil with a bit of oil or nonstick spray to prevent sticking.
Press one slice of ham into each muffin cup to form a little bowl, letting the edges come up and over the sides. If your ham slices are very small, gently stretch them so they cover the bottom and most of the sides; the goal is to create a cup that can hold an egg without leaking.
Sprinkle about half of the shredded cheddar cheese evenly into the bottom of the ham cups, reserving the rest for topping. This creates a cheesy base and helps soak up some of the egg as it bakes.
Crack one egg directly into each ham cup, on top of the cheese. Try to keep the yolk centered if you like that bright yellow look. If any whites spill over the edge, nudge them back in with a spoon so they stay mostly inside the ham.
Top each egg with the remaining shredded cheddar, dividing it as evenly as you can among the 12 cups. The cheese will melt and brown slightly, giving you that crispy, savory finish.
Place the muffin tin on a baking sheet (to catch any drips) and bake on the middle rack for 14–18 minutes, depending on how you like your eggs: closer to 14 minutes for soft, jammy yolks, and up to 18 minutes for firmer, fully set yolks. The ham edges should look crisp and slightly browned, and the cheese should be melted and bubbly.
Remove the pan from the oven and let the ham and egg cups cool in the tin for 3–5 minutes; this helps them set up and makes them easier to lift out without breaking. Then gently loosen each cup with a small spatula or butter knife and lift it out by the foil edges or by grasping the crispy ham sides.
Serve warm, 2 cups per person for a hearty, field-ready breakfast. For meal prep, let them cool completely, then store in an airtight container in the refrigerator for up to 4 days. Reheat in the oven or toaster oven at 350°F (175°C) for about 8–10 minutes, or in the microwave in short bursts until warmed through.
Variations & Tips
Use different cheeses like pepper jack, Swiss, or Colby for a flavor twist while still keeping it to three ingredients. If your deli ham is very thin, double up two slices per cup and reduce to 6 cups total for extra sturdiness and protein. For a more well-done yolk, you can lightly beat the eggs in a bowl first and pour a few tablespoons into each ham cup instead of cracking them in whole; this gives you a mini crustless quiche texture. To make them extra crispy, pre-bake the ham cups alone for 3–4 minutes before adding the cheese and eggs, then finish baking as directed. Food safety tips: Keep ham and eggs refrigerated until you’re ready to assemble, and wash your hands and any surfaces that touch raw egg. Bake until the egg whites are fully set and opaque; if you’re unsure, err on the side of a couple extra minutes in the oven. Store leftovers in the fridge within 2 hours of baking and reheat thoroughly before eating. Avoid leaving the baked cups at room temperature for extended periods, especially if you’re packing them for work or school—use an insulated bag with an ice pack if they’ll be out for more than a couple of hours.
