This 5-ingredient oven beef is my early-summer version of comfort food: everything goes into one pan, then the oven quietly does the work while you go about your evening. It’s built around fibrous, umami-rich cuts like beef chuck or beef shank—muscles with plenty of connective tissue that melt into tenderness with long, slow heat. Think of it as a stripped-down cousin of French daube or Italian brasato, but without the marinating, browning in batches, or long ingredient lists. You get deeply browned meat, glistening gelatinous edges, and a bubbly golden top, all from a cast iron skillet and a few pantry staples.
Serve this spoon-tender beef over creamy mashed potatoes, polenta, or buttered egg noodles to catch all the savory juices. For an early-summer table, I like a simple green side—blistered green beans, a crisp lettuce salad with a lemony vinaigrette, or sliced tomatoes with olive oil and salt. A crusty baguette is handy for swiping the pan, and if you enjoy wine, a medium-bodied red like a Côtes du Rhône or an Argentine Malbec pairs nicely with the rich, umami-forward sauce.
5-Ingredient Oven Beef
Servings: 4
Ingredients
2 1/2 pounds beef chuck roast or beef shank, cut into 2- to 3-inch chunks
2 teaspoons kosher salt
1 teaspoon freshly ground black pepper
1 1/2 cups beef stock or broth, preferably low-sodium
3 tablespoons unsalted butter, cut into small pieces
Directions
Heat the oven to 325°F (165°C). Place a 10- to 12-inch cast iron skillet or other heavy, oven-safe pan on the stovetop over medium-high heat while the oven heats so the pan is hot when the beef goes in.
Pat the beef pieces very dry with paper towels; this helps them brown instead of steam. Sprinkle all over with the kosher salt and black pepper, turning the pieces so every side is seasoned.
When the skillet is hot, arrange the beef pieces in a single, snug layer. You want the meat to be in close contact with the hot pan so it can develop a deep brown crust. Let the beef sear undisturbed for 4 to 6 minutes, until the underside is nicely browned and some fat has rendered.
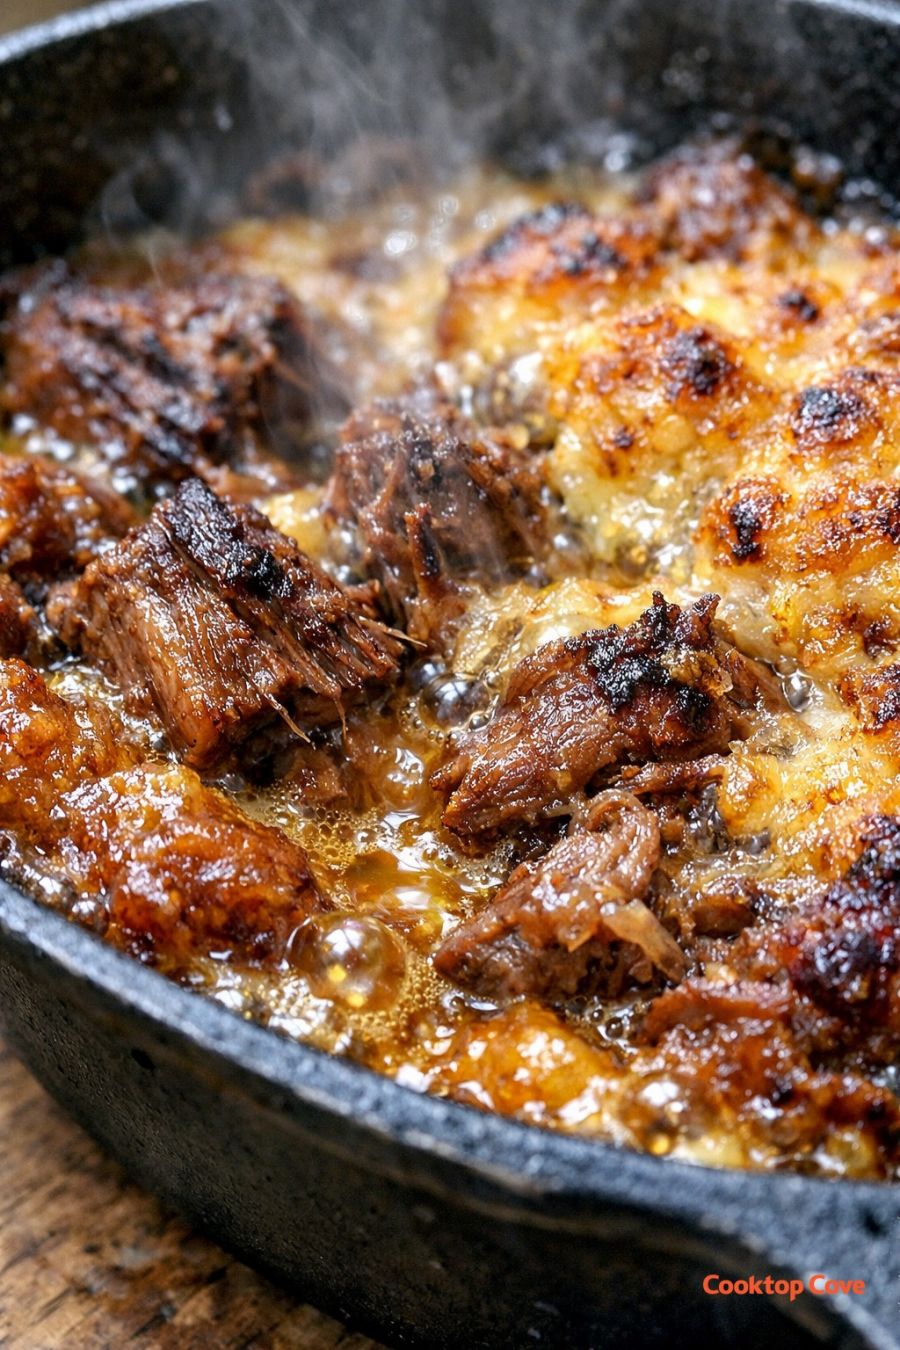
Turn the beef pieces and sear the other sides for another 4 to 6 minutes total, turning as needed, until most surfaces have good color. You’re not cooking them through at this stage—just building flavor and that rich, browned surface you see in the photo.
Carefully pour the beef stock into the hot skillet around the meat (it will steam and bubble), adding just enough to come about halfway up the sides of the beef. You don’t want the meat fully submerged; some exposed edges will brown and crisp in the oven while the submerged parts braise and turn silky.
Dot the butter pieces evenly over the top of the beef and the surface of the liquid. As the dish bakes, the butter will baste the meat, help the top brown, and give the juices a glossy, slightly thickened finish.
Cover the skillet tightly with a lid or a double layer of foil, crimping the edges to trap steam. Transfer to the preheated oven and bake for 1 1/2 hours without peeking; this steady, enclosed heat is what transforms the fibrous cuts into something spoon-tender.
After 1 1/2 hours, carefully remove the lid or foil (watch for steam). Baste the meat with the pan juices, then return the skillet to the oven, uncovered, and continue baking for 30 to 45 minutes. During this time the exposed edges of the beef will deepen in color, the fat and collagen will turn glistening and gelatinous, and the top will form a bubbly, golden, self-basting crust.
Check the beef: it should be very tender when pierced with a fork and starting to fall apart along the grain. If it still feels firm, continue baking in 10- to 15-minute increments, uncovered, until it yields easily. The exact timing depends on the specific cut and how large your chunks are.
Remove the skillet from the oven and let the beef rest for about 10 minutes. This brief rest allows the juices to settle slightly so they don’t all run out when you serve. Taste the pan juices and adjust with a pinch more salt or pepper if needed, then spoon the beef and its glossy, savory juices over your chosen side and serve warm.
Variations & Tips
You can lean this basic template in several directions without losing its effortless, 5-ingredient spirit. For a slightly brighter flavor, swap 1/2 cup of the beef stock for dry red wine; it will cook down and add a gentle acidity and depth. If you prefer a more robust crust, finish the dish under the broiler for 2 to 3 minutes at the end, watching carefully so the top browns deeply without burning. Different cuts behave a bit differently: beef chuck will shred and stay very moist, while beef shank brings extra gelatin and a bit of marrow richness. Avoid very lean cuts like round or sirloin—they don’t have enough connective tissue and will dry out with this long oven time.
If you want to add vegetables while still keeping things simple, tuck a few thick-sliced onions or halved shallots around the meat before adding the stock; they’ll melt into the juices and almost disappear. You can also scatter a handful of small waxy potatoes on top for a built-in side, though you may want to increase the stock slightly so the pan doesn’t dry out.
Food safety tips: Always start with fresh, properly refrigerated beef and keep it cold until you’re ready to cook. Patting the meat dry is about texture, but also helps it sear quickly, reducing the time it spends in the temperature “danger zone.” Use a clean cutting board and knife reserved for raw meat, and wash your hands, tools, and surfaces thoroughly with hot, soapy water after handling the raw beef. While braised beef is typically cooked well past the minimum safe internal temperature of 145°F (63°C), it’s still wise to ensure the center of the largest piece reaches at least that temperature before serving. Refrigerate leftovers within 2 hours of cooking in shallow containers, and reheat them to at least 165°F (74°C) before eating. The dish actually improves the next day, as the gelatin sets and the flavors concentrate, so don’t hesitate to make it ahead.
