This 6-ingredient oven beef using raw beef flanken ribs is the kind of no-fuss, big-flavor supper that fits right into a busy weeknight or a lazy Sunday. Around here in the rural Midwest, flanken ribs were often the ‘butcher’s secret’—cheap, meaty, and perfect for slow baking until they’re tender and sticky. With nothing more than a baking sheet, raw beef flanken ribs, and five basic fridge staples, you can slide this pan into the oven and let the house fill up with the kind of aroma that makes folks wander into the kitchen asking when dinner will be ready. It’s simple, practical, and tastes like something your grandmother might have pulled together on a chilly evening when everyone was hungry at once.
These oven-baked flanken ribs are wonderful piled onto a platter with buttery mashed potatoes or baked potatoes to catch all those pan juices. A simple side of green beans, corn, or a tossed salad balances the richness. If you like, add warm dinner rolls or crusty bread to mop up the sticky, savory glaze. For a more casual spread, serve the ribs with coleslaw and potato wedges, and set out a jar of pickles for that old-fashioned Midwestern table feel.
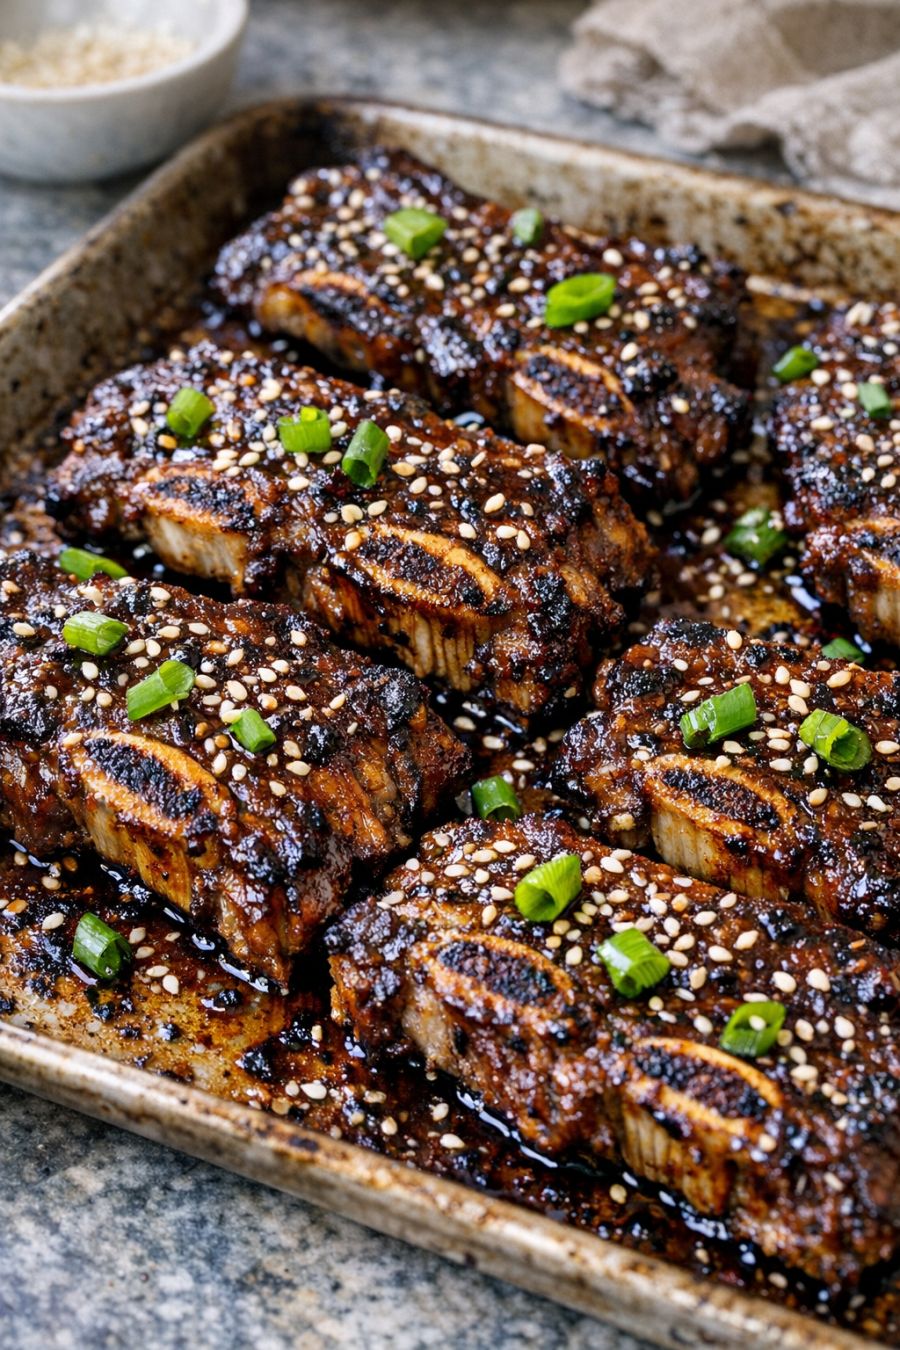
6-Ingredient Oven Beef Flanken RibsServings: 4
Ingredients
3 pounds raw beef flanken ribs
1/3 cup ketchup
1/4 cup soy sauce
1/4 cup Dijon or yellow mustard
2 tablespoons Worcestershire sauce
2 tablespoons vegetable oil (or other neutral cooking oil)
Salt and black pepper to taste (optional, from the pantry)
Directions
Preheat your oven to 325°F (165°C). Line a large aluminum baking sheet with foil for easier cleanup, if you like.
Lay the raw beef flanken ribs in a single, close layer on the baking sheet. If they overlap a little, that’s fine—just keep them mostly in one layer so they cook evenly.
In a small bowl, whisk together the ketchup, soy sauce, mustard, Worcestershire sauce, and vegetable oil until smooth and well combined. This is your simple fridge-door glaze.
Lightly season the ribs with a pinch of salt and black pepper if desired, then spoon or brush the glaze generously over the top and sides of the ribs, making sure every piece gets coated. Let the ribs sit on the counter for 10–15 minutes while the oven finishes heating; this gives the glaze a chance to cling.
Cover the baking sheet tightly with foil, tenting it slightly so it doesn’t stick to the meat. Slide the pan into the preheated oven and bake for 1 1/2 hours, until the ribs are very tender when pierced with a fork.
Carefully remove the foil (watch for hot steam), baste the ribs with the pan juices, and increase the oven temperature to 400°F (200°C). Return the uncovered pan to the oven and bake another 15–20 minutes, or until the glaze is bubbly and lightly caramelized around the edges.
Remove the ribs from the oven and let them rest on the baking sheet for about 5–10 minutes so the juices settle. Transfer to a warm platter, spoon some of the sticky pan juices over the top, and serve hot.
Variations & Tips
If you’d like a touch of sweetness, stir 1–2 tablespoons of brown sugar or honey into the glaze before brushing it on the ribs. For a little heat, add a teaspoon of prepared horseradish or a pinch of red pepper flakes from the pantry. You can also tuck a few onion slices from the fridge under and around the ribs for extra flavor and a soft, caramelized side bite. If you prefer a lighter sauce, replace half the ketchup with tomato sauce or even a splash of apple juice, and reduce the soy sauce slightly for lower sodium. For make-ahead convenience, you can coat the raw flanken ribs in the glaze, cover the baking sheet, and refrigerate for up to 12 hours before baking; this deepens the flavor.
Food safety tips: Always keep the raw beef flanken ribs refrigerated until you’re ready to cook, and don’t let them sit out at room temperature for more than about 30 minutes. Use a clean spoon or brush each time you baste, or reserve some glaze in a separate bowl so it doesn’t get contaminated with raw meat juices. Make sure the ribs reach a safe internal temperature of at least 145°F (63°C), though for tenderness you’ll likely cook them longer as directed. Refrigerate leftovers within 2 hours, store them in a covered container, and reheat thoroughly before eating.